
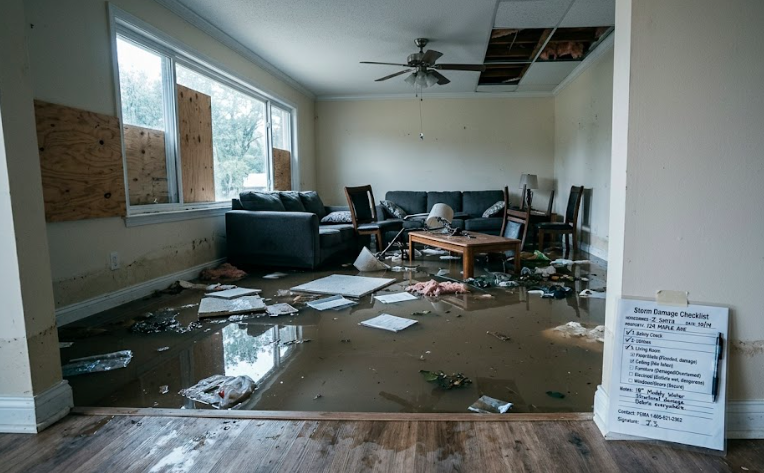
When a storm hits and floodwaters enter your property, the clock starts immediately. The first 72 hours after flooding are the most critical window for limiting structural damage, preventing mold growth, and protecting the health and safety of everyone inside. Without a clear plan, property owners often waste precious hours and that delay can turn a manageable cleanup into a full-scale remediation project.
This checklist walks you through exactly what to do, hour by hour, to take control of the situation before permanent damage sets in. Whether you’re dealing with flash flood damage, storm surge, or sewage backup, the same core principles apply.
If you need professional water damage restoration services at any point in this process, don’t hesitate early intervention is the single biggest factor in reducing total damage costs.
Why the First 72 Hours Matter So Much
Mold spores begin colonizing damp surfaces within 24 to 48 hours of water exposure. Structural materials drywall, subfloor, insulation, wood framing absorb moisture rapidly and begin to swell, warp, and degrade within the same window. Electrical systems exposed to standing water create shock and fire hazards. The longer water sits, the worse every one of these problems becomes.
Acting within the first 72 hours gives you the best chance to:
- Prevent mold from taking hold
- Salvage structural materials that would otherwise require full replacement
- Reduce total repair costs significantly
- Keep occupants safe from waterborne bacteria and biohazards
- Preserve documentation for insurance claims
Hours 0–6: Safety First, Then Assessment
1. Do Not Enter Until It Is Safe
Before stepping inside, confirm:
- Structural integrity – visible cracks, leaning walls, or sagging ceilings indicate the structure may be compromised
- No active gas leaks – if you smell gas, leave immediately and call your utility provider from a safe distance
- Power is off – contact your utility company to shut off electricity if any water reached electrical panels, outlets, or wiring
Never assume floodwater is clean. Even rainwater runoff picks up sewage, pesticides, animal waste, and industrial chemicals as it moves across streets and through drainage systems.
2. Put On Protective Gear
Before any cleanup begins, gear up:
- Rubber boots (knee-high or waders for significant flooding)
- Nitrile or rubber gloves
- N95 respirator or higher especially if sewage backup is suspected
- Eye protection
- Protective clothing you can wash immediately after
3. Document Everything Before You Touch Anything
Walk through the affected area with your phone and record video of all damage from every angle. Take close-up photos of:
- Waterlines on walls (shows flood depth)
- Damaged flooring, furniture, and belongings
- Structural damage
- Affected appliances and mechanical systems
This documentation is critical for insurance claims. Do not move or discard any damaged items until you have thorough photographic evidence.
4. Contact Your Insurance Company
Call your insurance provider as soon as it is safe to do so. Report the loss, ask about your coverage for water and flood damage, and request a claim number. Ask specifically:
- Does your policy cover storm-related flooding vs. rising groundwater (these are typically separate policies)?
- Are you required to use specific contractors, or can you choose your own?
- What emergency mitigation steps are covered?
Hours 6–24: Stop the Water, Start Extraction
5. Stop Any Ongoing Water Intrusion
If water is still entering the structure:
- Shut off the main water supply if the source is internal (pipe burst, appliance failure)
- Use sandbags, plastic sheeting, or flood barriers to redirect external water away from the foundation
- Clear gutters, downspouts, and drains if they are blocked and contributing to pooling
6. Begin Water Extraction Immediately
The faster standing water is removed, the less damage accumulates. Options:
- Wet/dry shop vacuum – effective for smaller volumes in localized areas
- Submersible sump pump – for basements or rooms with several inches of standing water
- Professional extraction equipment – truck-mounted extraction units used by restoration companies remove water dramatically faster than consumer equipment
For significant flooding, professional extraction is not a luxury it is the fastest way to stop the clock on damage accumulation. Water damage restoration experts have industrial extraction equipment that removes water in a fraction of the time that consumer tools require.
7. Remove Saturated Materials That Cannot Be Dried
Certain materials act as permanent moisture reservoirs if they absorb floodwater:
- Drywall soaked more than halfway up should be cut out and removed (cut at least 12 inches above the visible waterline)
- Wall-to-wall carpet and padding almost always unsalvageable after significant flooding; retains moisture and bacteria even after drying
- Insulation fiberglass and cellulose insulation hold water and promote mold; remove and replace
- Particleboard and MDF swells, delaminate, and cannot be effectively dried; remove
Hardwood flooring, solid wood furniture, and some structural lumber can sometimes be dried and salvaged if extraction begins within the first 24 hours.
Hours 24–48: Dry, Ventilate, and Treat
8. Set Up High-Capacity Drying Equipment
Once standing water is extracted, residual moisture in walls, floors, and structural cavities must be addressed aggressively:
- Air movers / industrial fans positioned to push air across all wet surfaces; more effective than standard box fans
- Dehumidifiers commercial-grade units pull moisture from the air at rates household dehumidifiers cannot match; aim to get relative humidity below 50%
- Open windows and doors if outdoor humidity is lower than indoor humidity; close them if outside air is more humid
Monitor moisture levels using a moisture meter surfaces that appear dry to the touch may still carry dangerous moisture levels inside the material.
9. Inspect for Mold and Act Immediately If Found
Within 24–48 hours, visually inspect all affected surfaces for early mold growth. Look for:
- Discoloration (black, green, gray, or white fuzzy patches)
- Musty or earthy odors even in areas that appear visually clean
- Bubbling or peeling paint or wallpaper (often indicates moisture behind the surface)
Do not use bleach on porous surfaces. Bleach kills surface mold on non-porous materials but does not penetrate porous materials like drywall or wood it kills the surface growth while leaving the root structure (hyphae) intact. Use an EPA-registered antimicrobial or call a professional mold remediation service.
10. Clean and Disinfect All Affected Surfaces
Floodwater carries pathogens. All hard surfaces that made contact with floodwater concrete, tile, metal, solid wood must be:
- Cleaned of debris and sediment with a stiff brush and cleaning solution
- Rinsed thoroughly
- Treated with an EPA-registered disinfectant
- Allowed to air dry completely
Pay particular attention to areas prone to human contact: countertops, floors, door handles, and any surface in kitchens or bathrooms.
Hours 48–72: Verify, Prevent, and Plan Repairs
11. Re-Check Moisture Readings
Re-test all areas with a moisture meter. Areas that read elevated at 24 hours should be trending downward by 72 hours with proper drying equipment in place. If readings are not decreasing:
- Reposition air movers to improve airflow to problem areas
- Check for hidden moisture pockets behind walls using a thermal imaging camera or penetrating moisture meter
- Consider calling a professional drying specialist if equipment is not making progress
12. Assess HVAC, Electrical, and Plumbing Systems
Do not restore power or operate HVAC systems until a qualified professional has inspected:
- Electrical panels, outlets, and wiring that may have been submerged
- HVAC ductwork flooded ducts distribute mold spores and bacteria throughout the building when the system runs; ducts must be inspected and cleaned before operation
- Water heater and furnace gas appliances exposed to water must be inspected before use
- Plumbing check for drain backups and damaged supply lines
13. Dispose of Biohazardous Materials Properly
If sewage backup was involved, any materials contaminated by category 3 (black water) must be treated as biohazardous:
- All porous materials (drywall, insulation, carpet, cardboard, upholstered furniture) must be double-bagged and disposed of per local regulations
- Do not place biohazardous materials in standard recycling streams
- Contact your local waste management authority for guidance on bulk pickup and hazardous material disposal
14. Secure the Property Against Further Damage
Before restoration crews arrive and before you leave the property unattended:
- Board up broken windows and doors
- Apply roof tarps to any roof damage to prevent additional water intrusion from rain
- Remove debris from around the structure that could redirect water into the building
- Secure any openings in the foundation
Document these temporary protective measures most insurance policies require that you take reasonable steps to prevent further damage after an initial loss event.
15. Create a Repair Plan and Timeline
By hour 72, you should have:
- A complete inventory of damaged items and materials
- A moisture mapping document showing which areas are drying and which are not
- An insurance claim in progress
- A shortlist of licensed restoration contractors
- A timeline for structural repairs to begin
Do not rush permanent repairs walls and floors must reach acceptable moisture levels before drywall, flooring, or insulation is reinstalled. Sealing moisture inside a structure is a common mistake that leads to mold problems months later.
When to Call a Professional Restoration Company
Some situations require professional intervention immediately, regardless of where you are in the 72-hour window:
- Sewage backup or black water contamination personal protective equipment and specialized disposal procedures are non-negotiable
- Flooding that affected more than one room volume and structural impact require commercial equipment
- Visible mold growth at the time of discovery indicates the moisture problem predates the storm event
- Any flooding that reached electrical panels or HVAC systems
- Properties occupied by elderly residents, children, or anyone with respiratory conditions
Attempting to self-remediate category 2 or category 3 water damage without professional equipment frequently results in hidden mold growth that surfaces months later often after walls have been closed back up.
Quick Reference: 72-Hour Storm Damage Checklist
Hours 0–6
- Confirm structural safety before entry
- Shut off gas and electricity
- Put on full PPE
- Photograph and video all damage
- File insurance claim
Hours 6–24
- Stop active water intrusion
- Extract all standing water
- Remove unsalvageable porous materials (drywall, carpet, insulation)
- Begin air movement and dehumidification
Hours 24–48
- Continue aggressive drying
- Inspect for mold
- Clean and disinfect all hard surfaces
- Monitor moisture levels
Hours 48–72
- Re-check moisture readings across all areas
- Have HVAC, electrical, and plumbing professionally inspected
- Dispose of biohazardous materials properly
- Secure the property against further damage
- Build repair plan with contractor
Final Thoughts
The 72-hour window after flooding is not forgiving. Every hour of delay increases the probability of mold colonization, structural compromise, and total replacement costs. The homeowners and property managers who fare best after flood events are those who move immediately, document thoroughly, and bring in professional help before the situation escalates beyond the point of salvage.
For guidance on water damage restoration, timelines, and what to expect from a professional remediation process, explore the resources available from our storm damage cleanup professionals at Hazard Cleanup Phoenix. Our team is available to respond across the Phoenix metro area and surrounding communities.
Leave a Reply